I’m having a small group of my Paper Pumpkin subscribers over this week for Paper Pumpkin Power Hours. Yes….we are going to get some of those kits done! I may literally have to be paper Pumpkin drill sergeant but the goal is completed kits!
I always like to have a little treat for my guests so I whipped these up tonight. When I need a little 3D “something” I always turn to my favorite box maker, Sam at http://www.Pootles.co.uk. If you haven’t been to her blog, you have to go there and you have to set it as a favorite. No matter what size box or packaging you need….she has it there with super easy to follow instructions. She is my go to gal. I’ve had the privilege of talking to her in person and she is really as fun and passionate about her craft as she sounds in her videos. You can’t help but love her.
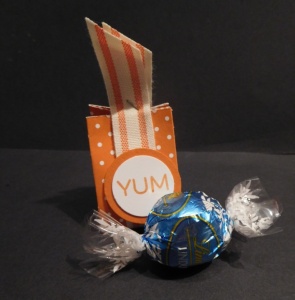
I wanted something for a Lindor Chocolate and this little cutie did the trick. And it only uses a 3 x 6 inch piece of paper!
I did them up in the 2014-2015 In Colors with the new coordinating ribbon. The “Yum” is from the January 2014 Paper Pumpkin kit. This picture is a little deceiving to give you a sense of the size. They are very cute and very small. Here is the Tangelo Twist one next to the Lindor Chocolate. Literally one will fit inside!
Copying the measurements from Sam’s blog for your reference.
3″ x 6″ piece of DSP (print paper)
Score on long edge at 1 3/8″, 2 3/4″, 4 1/8″, and 5 1/2″
Score on short edge at 1″
Fold and adhere sides. Pinch top closed and secure as desired. I just tied the ribbon tight around the box and held it in place with a tiny staple.


